Drone Flight Controller Circuit Diagram The flight controller is the brain of a drone as it monitors and controls everything the drone does.KK2.1.5 and CC3D are widely used flight controllers in drones. In our previous tutorial, we have used KK2.1.5 Flight Controller to fly a drone.You don't require any PC to set up the KK2.1.5 flight controller as it comes with an inbuilt screen and we can set up this flight controller using buttons. A drone circuit is the electronic system that powers and controls a drone's flight. It consists of various components such as a flight controller, motors, propellers, and a power source. Building a drone circuit is necessary because it allows you to customize your drone's performance, range, and features to suit your specific needs and The flight controller circuit is a crucial component of a drone, responsible for controlling its flight movements and ensuring stability and control. It is essentially the brain of the drone, processing input signals from various sensors and controlling the motors and other actuators to achieve desired flight behavior.

A very important component of the modern drone is a flight controller. I entered the world of drones at the end of 2019 and have been learning about flight control in-depth ever since. In this blog, I am going to talk about flight controllers in a way everyone understands. Physically, a flight controller is nothing more than a circuit board This circuit is a wireless drone control system utilizing two Arduino Nano microcontrollers. One Arduino Nano is configured as a transmitter with a joystick module, potentiometer, pushbuttons, and an NRF24L01 module for sending control signals. Mounting: Secure the flight controller to the drone frame, ensuring it is level and free from

How to Build a Quadcopter Drone Using CC3D Flight Controller Circuit Diagram
KK2.1.5 Flight Controller. KK2.1.5 is a flight controller; the flight controller is also called the brain of the drone because with this all the operation of the drone is controlled. KK2.1.5 has ATMEL mega 664PA IC inbuilt inside it. It is 8-bit AVR RISC based microcontroller with 64k of memory.
As an electronic engineer and FPV drone pilot, making my own flight controller has been a project around for a while. I finally get it done, so let's dive into the design process of a Betaflight based flight controller. To get the most noise-free video, I decided to power the whole video circuit (i.e camera and OSD chip) from the same On the top left of the window, select the port your flight controller is on and click on start. Sensor Values should show on the application. On the right, select the sensor type. To calibrate the sensor, slowly move/tilt the flight controller as prompted. A model of the desired drone should appear on the application.

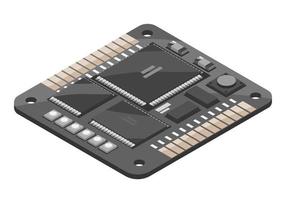
Designing my own Flight Controller Circuit Diagram
Setup the KK2.1.5 flight Controller. Methods to set up KK2.1.5 and KK2.1 flight controllers are not the same. Here, we are going to set up the KK2.1.5 flight controller, you cannot use this method for KK2.1. Firstly, make all the proper connections according to part - 1 of this tutorial build your own Drone using KK2.1.5 Flight Controller Once the flight controller is calibrated, the pilot can then start flying the drone. To do this, the pilot will use the throttle channel to increase or decrease the speed of the drone's motors. The pitch channel is used to control the angle of the Drone. Circuit Diagram - ESP8266 Flight Controller